Last revision:
In addition to each webform having its own path, webforms are automatically available as blocks, and you can place them wherever you can place any other block.
Showing a webform in the sidebar, as a block
Adding a webform-as-a-block is straightforward:
- Go to Administration > Structure > Block Layout.
- Add the
Webformblock to sidebar region. - In the block's configuration settings, select which webform to show.
- Save the block.
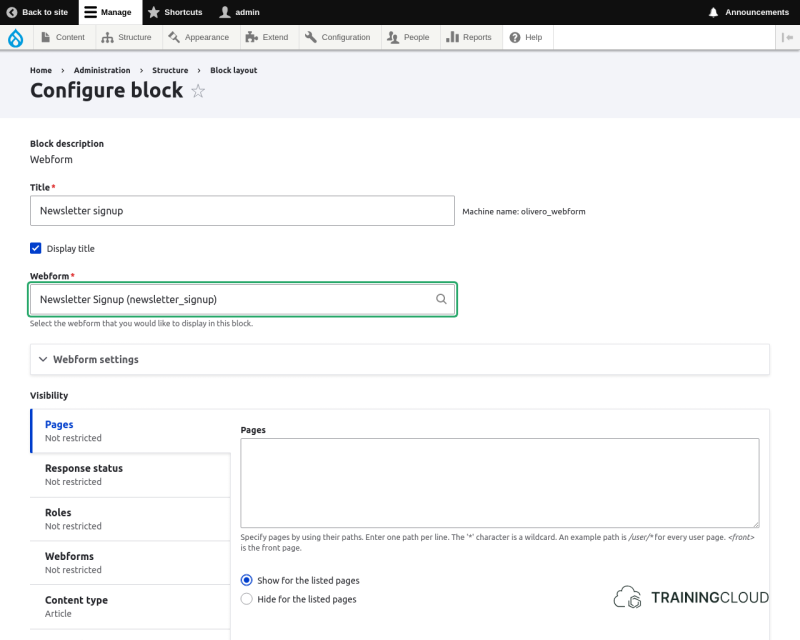
As with all blocks, you can add multiple blocks to the same page, or to different pages, by adding the Webform block more than once, each time referencing a different webform and setting different visibility options to make the blocks appear on different pages.
Activity 1A
- Create a "Newsletter Signup" form that contains an "Email" field.
- Create a Webform block that shows this form.
- Show the block in a sidebar, on all Article node pages.
Activity 1B
By default, the newsletter signup block will redirect to a generic confirmation page where a confirmation message is shown.
- Make sure users are directed back to the same page after the signup form is submitted.
Activity 2
Create a second instance of the Webform block.
- Make it show the same form.
- Show this block only on the front page.
- Give it a different title than the first webform block you made.
Summary
- Every webform is available as a block.
- To add a webform block to a page:
- Add the
webformblock. - Indiciate which webform to show.
- Save block.
- Add the