Objectives & prerequisites
- Build a new form
- Compare various form elements
- Choose between similar form elements
Building a form step by step
Let's build a basic Christmas Dinner booking form step by step.
Your organization has a yearly Christmas dinner, and wants a form so employees can book a seat.
People should be able to provide:
- their name
- their email address
- their dietary preference (single choice, multiple options)
- their drinks preference (multiple choice)
- a generic remark
(You will be adding more and more functionality to this form as you progress through the course)
Activity 1
- If you're feeling adventurous, try building the form yourself before following along step by step.
Step by step
Create the form
Create a new form named "Christmas Dinner Reservation 2024" at Administration > Structure > Webforms.
Add an element for the user's name.
You can add elements via the Add element button:
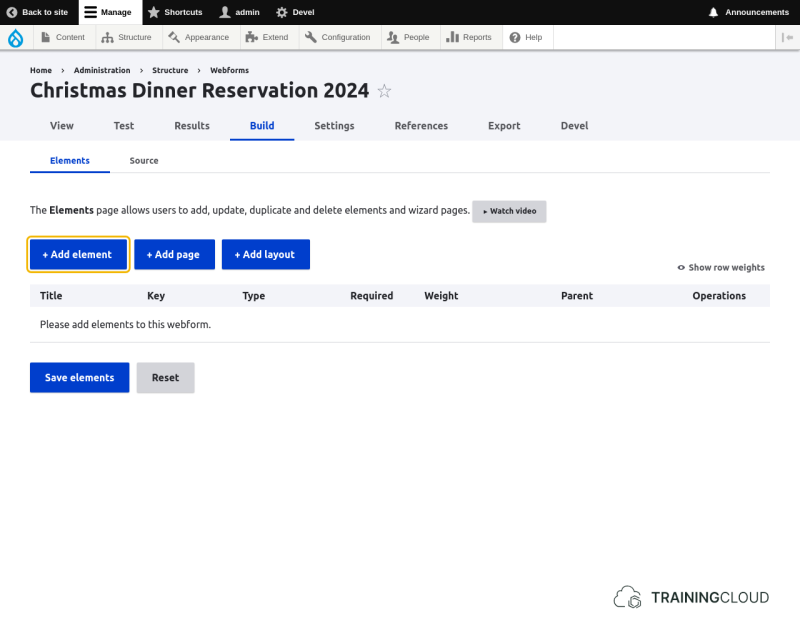
→ Add an appropriate element for the user's name.
You'll need to decide whether you want one single element for the name, or separate elements for first and last name.
You'll also need to decide which type of element to select, based on the type of information that will be stored (text, number, date, ...).
Add an element for the user's email address
The most appropriate element choices for capturing email addresses are "Text field" and "Email".
They both look like simple text elements. What's difference? What advantage does the "Email" element have over a basic "Text field" element?
→ Add an "Email" element
Add an element for the user's dietary preference
Users should be able to select one option from a list of options.
Three element types look useful:
- "Select" (provides a select list / dropdown element)
- "Radio buttons" (provides a list of round radio buttons)
- "Checkboxes" (provides a list of square checkboxes)
The first two are form elements that let you select exactly one option.
The last form element lets you select multiple options.
The requirements specify that users should choose one option, so you can use a "Select" or "Radio buttons" element. The choice is yours.
→ Add the element and provide the following choices:
- vegan
- vegetarian
- pescatarian
- everything's good
→Which element type did you choose, and why?
Does one have advantages over the other?
Add an element for the user's drinks preference
Users should be able to select one or more options from a list of options.
The most appropriate element that lets users select multiple options is "Checkboxes".
→ Add the element and provide the following choices:
- water
- fruit juice
- white wine
- red wine
Add an element for general remarks.
You'll need an element that lets users add multiple rows of text.
There are several element types you could potentially use:
- "Text area" (accepts only plain text)
- "Basic HTML" (rich text; accepts some HTML)
- "Advanced HTML" (rich text, accepts more HTML)
For our scenario we only want to let users enter simple plain text, so the basic "Text area" element is what we need.
→ Add the element.
Check the result
If everything went well, your form should look similar to this:
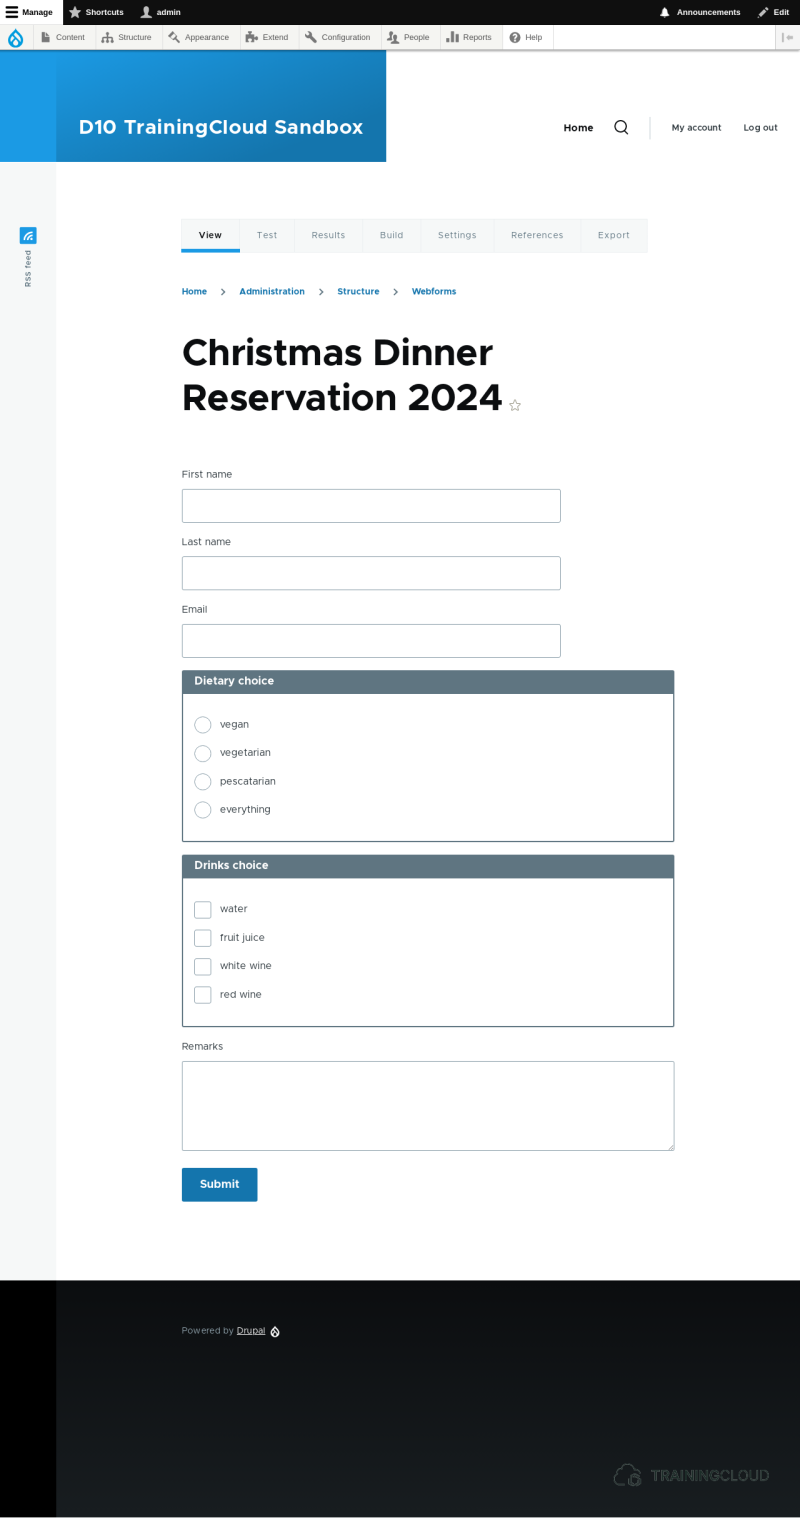
Activity 2A
- The first name and last name elements look a little bit too long. Find a way to make them both shorter.
Activity 2B
- The configuration options for "Text field" elements include the following two options:
SizeMaxlength - Try out these two different settings and figure out the difference.
Activity 2C
- Make all elements except the "Remarks" field mandatory.
Activity 2D
Element types such as "Text field" have the following, related configuration options:
PlaceholderPrepopulateDefault value
Can you figure out the difference between these three options?
Which option do you need to set to show a temporary value that disappears when a user starts to enter a value?
Special-purpose elements
As you may have noticed, several special-purpose elements are available, such as:
- link
- telephone
- address
It's often easier and quicker to use these elements instead of using basic text and number elements. They are more complex and need more configuration, but they also often offer additional display options and validation logic that simpler elements don't have.
The "Email" element, for instance, will check if the given value has a valid email format, and can display the address as a link. Neither of these things is possible (without writing custom code) if you use the simple "Text field" element.
This approach is identical to the choice you have when adding a text field or email field to a Content Type using the Field UI. In both cases you need to consider the type of data you want to capture, and whether or not one field type has certain advantages over the other field type.
Activity 3
Create a new form, give it any name you want, and add 10 different elements that look interesting, and that you haven't used before.
Some elements we find interesting:
- Email confirm
- Range
- Advanced HTML/Text
- Select other
- Likert
Make sure to explore and experiment with the configuration options of each element you add.
Activity 4
Duplicate your Christmas Dinner form. You can do this on the main Form Manager page via the duplicate dropbutton action:
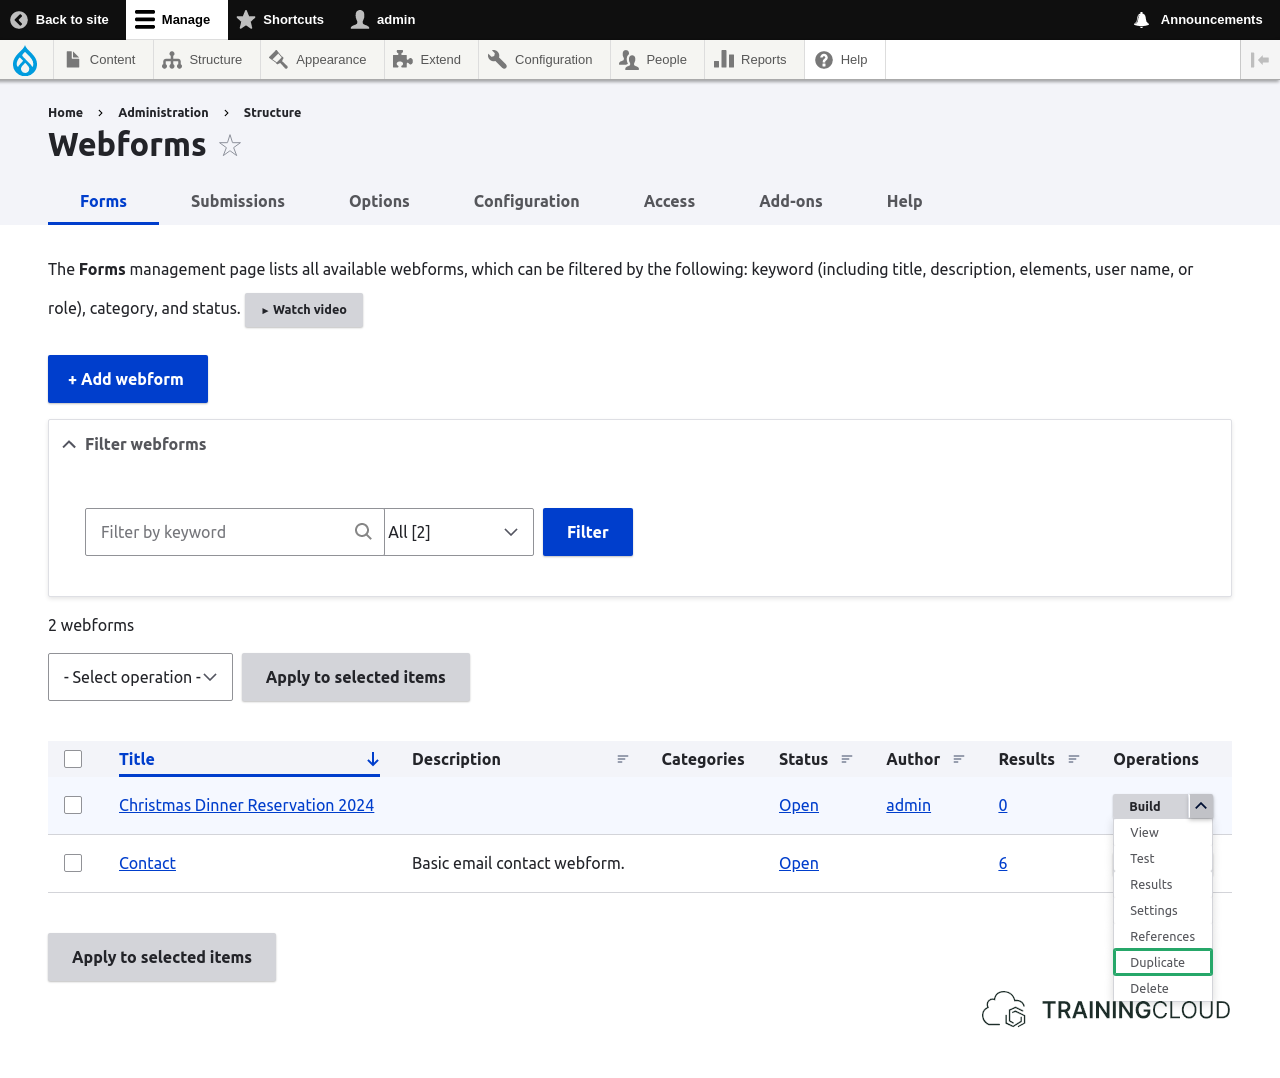
If you explore the available element types, you may notice that there is an element type called "name".
From the duplicated form, remove the "Text field" element(s) you used for the name, and add an element of the type "Name" instead. Explore its configuration options.
Compare your previous choice (1 or 2 elements for first and last name) with this more complex, multi-field element.
- Which approach do you prefer?
- Which advantages does this "Name" element type have?
Activity 5
Some element types provide form elements for which users can provide values; others provide static text, or a way to group fields together.
Create a new form, name it "Container elements", and add each of the following elements:
- 1 "Container"
- 1 "Details"
- 1 "Fieldset"
- 1 "Section"
Add at least one other element as a child element inside each of the four container elements. Maybe you can choose fields you haven't looked at yet, instead of just simple text elements.
→ You can reorganize your elements with drag-and-drop, and even drag fields into other container elements.
Summary
- Many element types exist.
- Some elements are basic, with few options.
- Other elements contain multiple fields and have many options.
- "Container" element types provide only layout or grouping options.
- You can rearrange elements via drag-and-drop
- Your choice of field type depends on:
- The type of data that will be entered.
- The available configuration options.
- Whether you need specific validation options.
- You can duplicate entire webforms via the Form Manager.