If you want to automatically send mail after a webform is submitted, you need to create an email handler at Administration > Structure > Webforms > Your form > Setting > Emails / Handlers:
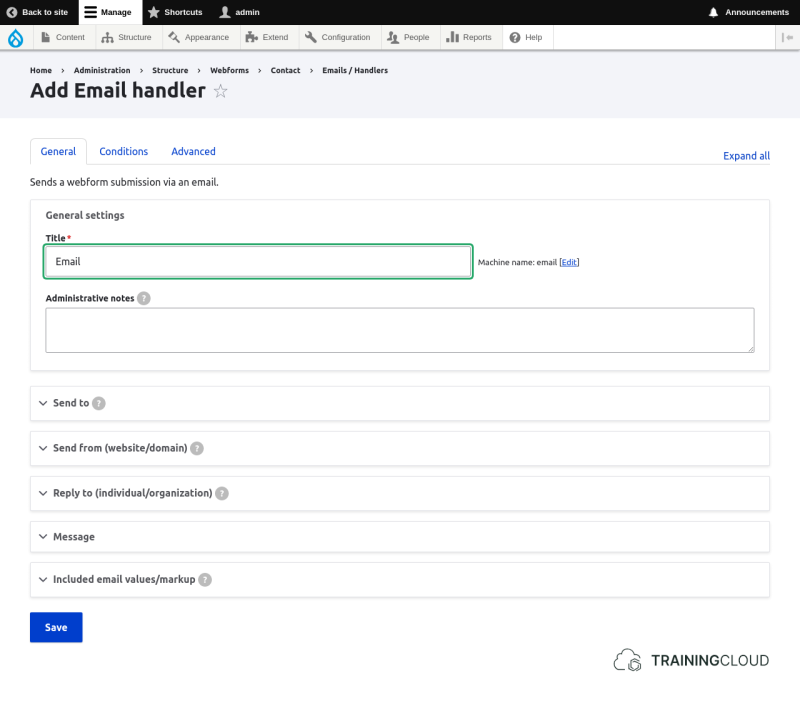
You will need to specify a few things:
- the name of the handler
- where the mail needs to go ("to")
- where the the mail comes from ("from")
- the title of the mail ("subject")
- the actual mail message ("body")
Send to
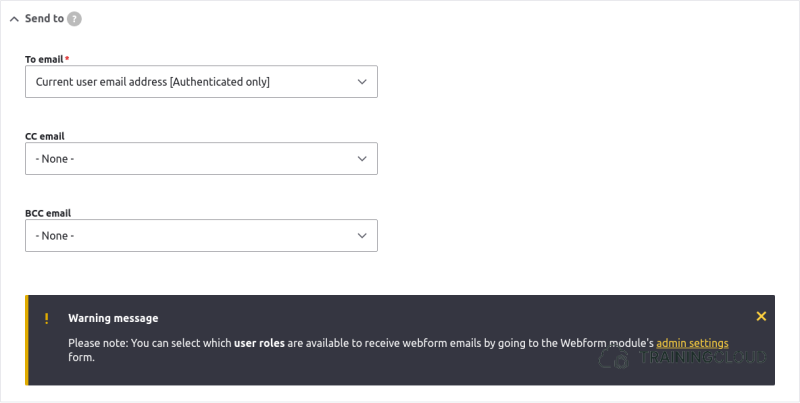
You need to specify the recipient, and, optionally, CC and BCC recipients.
The select list gives you access to the form elements as well as useful site-wide information such as the website's general email address and the email address of the user who created the form.
Send From
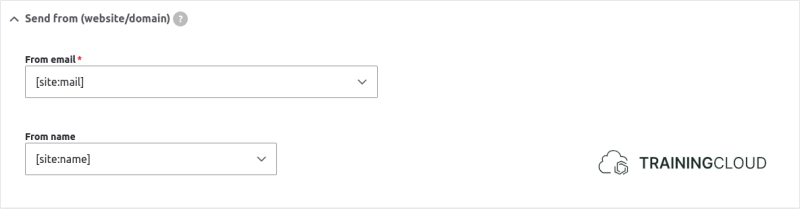
You need to specify the name and email address from which the mail will be sent.
Note:
As with all systems that send mail, including Drupal, you need to make sure your server is allowed to send mail from the indicated domain.
For instance, while it's technically possible for you have Drupal send a mail from Bill Gates<bill.gates@microsoft.com>, it will most likely be blocked by spam filters because your server does not have permission to send mail that is supposedly coming from the domain microsoft.com.
To learn more about allowing servers to send mail for specific domains:
- SPF records (Cloudflare)
- DKIM records (Cloudflare)
Message
You can set completely custom subject and message values, or you can take those by combining submitted form data.
An example of this would be starting the mail message with a customized greeting that uses the your_name form element:
Hello [webform_submission:values:your_name],
Thank you for your registration.
Available submitted values
The Included email values/markup fieldset contains all the form elements you can access; the Key column shows each element's identifier (machine name):
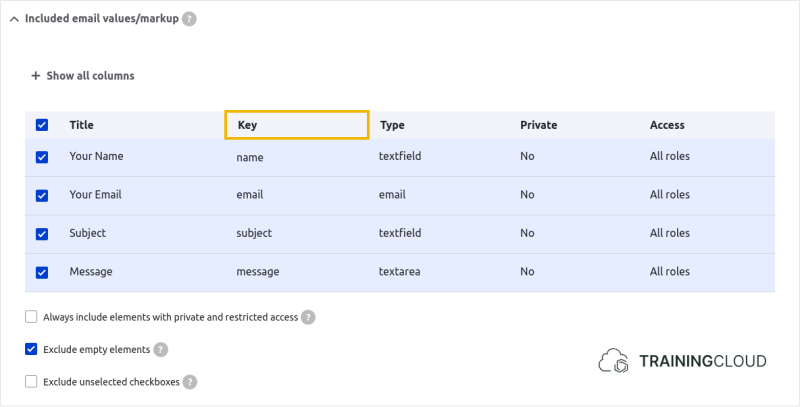
In this case, the tokens that represent the available submitted form elements are:
[webform_submission:values:name][webform_submission:values:email][webform_submission:values:subject][webform_submission:values:message]
Testing Email handlers
When you set up automated emails, it's important to test them to make sure all conditions are set properly, and the message is displayed correctly.
The Maillog module is extremely useful tool that should be part of every Drupal site that sends mail. It lets you record all outgoing mails in a special log, and it can optionally prevent mail from being sent to the outside world.
Activity 1
- Enable the Maillog module
- At Administration > Configuration > Development > Maillog settings:
- unselect "Allow the e-mails to be sent"
- unselect "Display the e-mails on page"
- save
You can now see all the outgoing mail that Maillog captures at Administration > Reports > Maillog, and inspect each individual mail's headers and body.
Disabling "Allow the e-mails to be sent" is useful when you want to stop all mails from being sent.
**Note: **
On a live production site, it's useful to keep the Maillog module enabled (so you will always be able to see which mails Drupal has tried to send), but of course with "Allow mails to be sent" enabled, otherwise no mails will actually go out into the world.
Activity 2
- Duplicate the Contact webform.
- Remove the two default mail handlers
- Try to recreate the handlers you just removed:
- One handler should send a confirmation mail to the user who submitted the form. The boddy should contain all the values the user submitted.
- The other handler should send a mail to the sit administrator(s), notifying them that there is a new submission, and showing the administrative link they can use to manage the submission.
Summary
- Email handlers let you send email after a webform is submitted.
- You have access to all of the submitted values to populate the To, From, Subject, and Message fields.
- You can test automated emails with modules such as Maillog, which can log and intercept all outgoing mail.